In my home lab, I manage my own “datacenter” using the popular Proxmox hypervisor. Proxmox enables me to create multiple virtual machines (VMs) directly connected to my home network/switch. Essentially, this setup functions as a cloud computing environment since you can spin up or down as many virtual machines and virtual appliances as you want. However, deploying web applications directly onto these VMs has several drawbacks. It’s not easily scalable, deployment and installation can be cumbersome, and resource efficiency is suboptimal. For example, I need to install the correct Python version and dependencies individually on each of my servers where I want to deploy my application.
Embracing Kubernetes
To address these challenges, I’ve turned to Kubernetes—a cloud-native solution for deploying and orchestrating containerized applications. In this article, I will describe how to set up a Kubernetes cluster with one control plane node and three worker nodes. We will not be using kubeadm and the full Kubernetes installation, which is heavy, complicated, and overkill for a small home lab. Instead, we will be using microk8s, a smaller and lighter installation. Microk8s is Cloud Native Computing Foundation (CNCF) certified, production-ready, and the installation is a breeze. All kubectl commands work the same here, and all Kubernetes features are available, or if not, they can be installed as a plugin.
Setting up the Kubernetes cluster
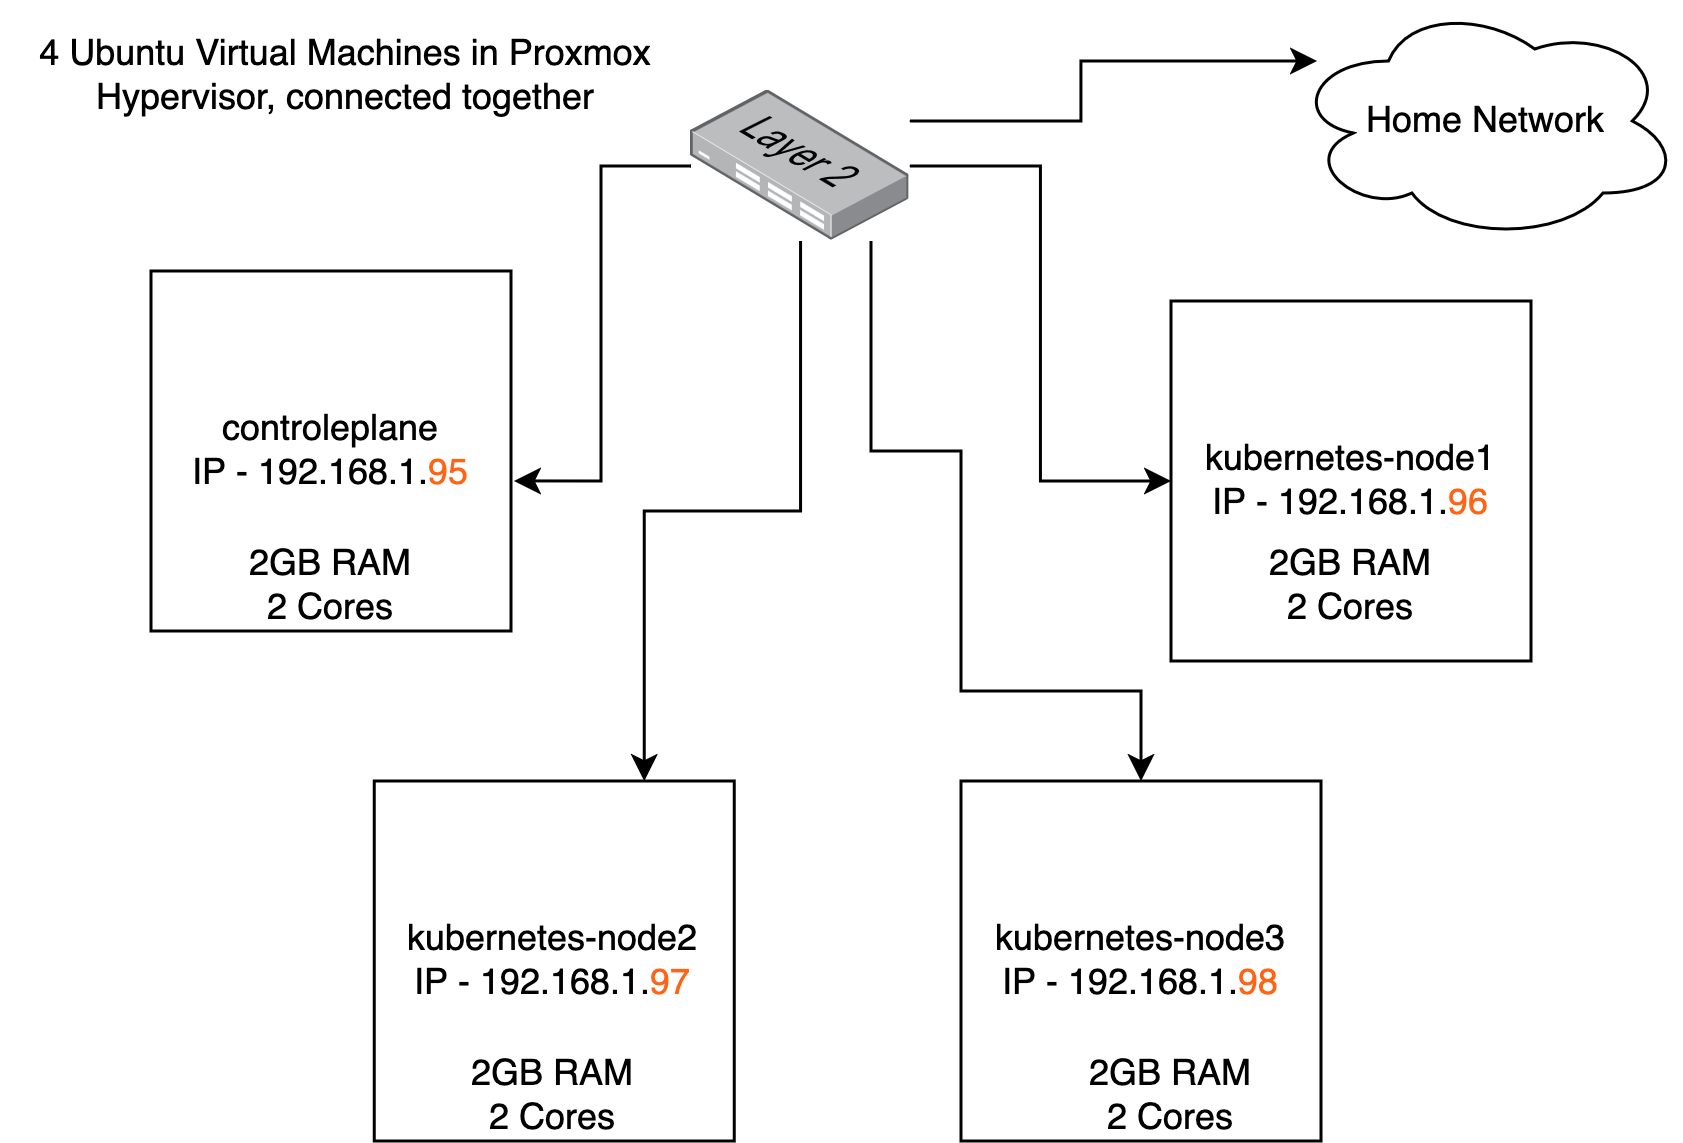
Each person’s homelab environment may differ. In this case I’ve installed Ubuntu LTS on all four virtual machines. Ensure that all four VMs, which we will now call nodes, are connected to my home network and are accessible via SSH. They have their own IP addresses and are connected to the switch, as shown in the diagram.

| Virtual machine hostname | IP address | Specs |
|---|---|---|
| controlplane | 192.168.1.95 | 2GB RAM/ 2 Core |
| kubernetes-node1 | 192.168.1.96 | 2GB RAM/ 2 core |
| kubernetes-node2 | 192.168.1.97 | 2GB RAM/ 2 core |
| kubernetes-node3 | 192.168.1.98 | 2GB RAM/ 2 core |
Log into all 4 nodes and run these commands in each node
This will install microk8s
>sudo snap install microk8s --classic
>sudo usermod -a -G microk8s $USER
>sudo chown -f -R $USER ~/.kube
>su - $USER
Now let’s verify that your installation has succeeded, and configure some more things like metrics-server
>microk8s kubectl version
>microk8s status --wait-ready
>microk8s kubectl get all --all-namespaces
>microk8s enable dashboard dns metrics-server
>microk8s dashboard-proxy
The commands should execute successfully and signifies that your kubernetes cluster is now ready. I recommend creating an alias to the microk8s kubectl command as it can be a chore to type all that frequentlty. Open your .bashrc file and add this line: alias k=’microk8s kubectl’
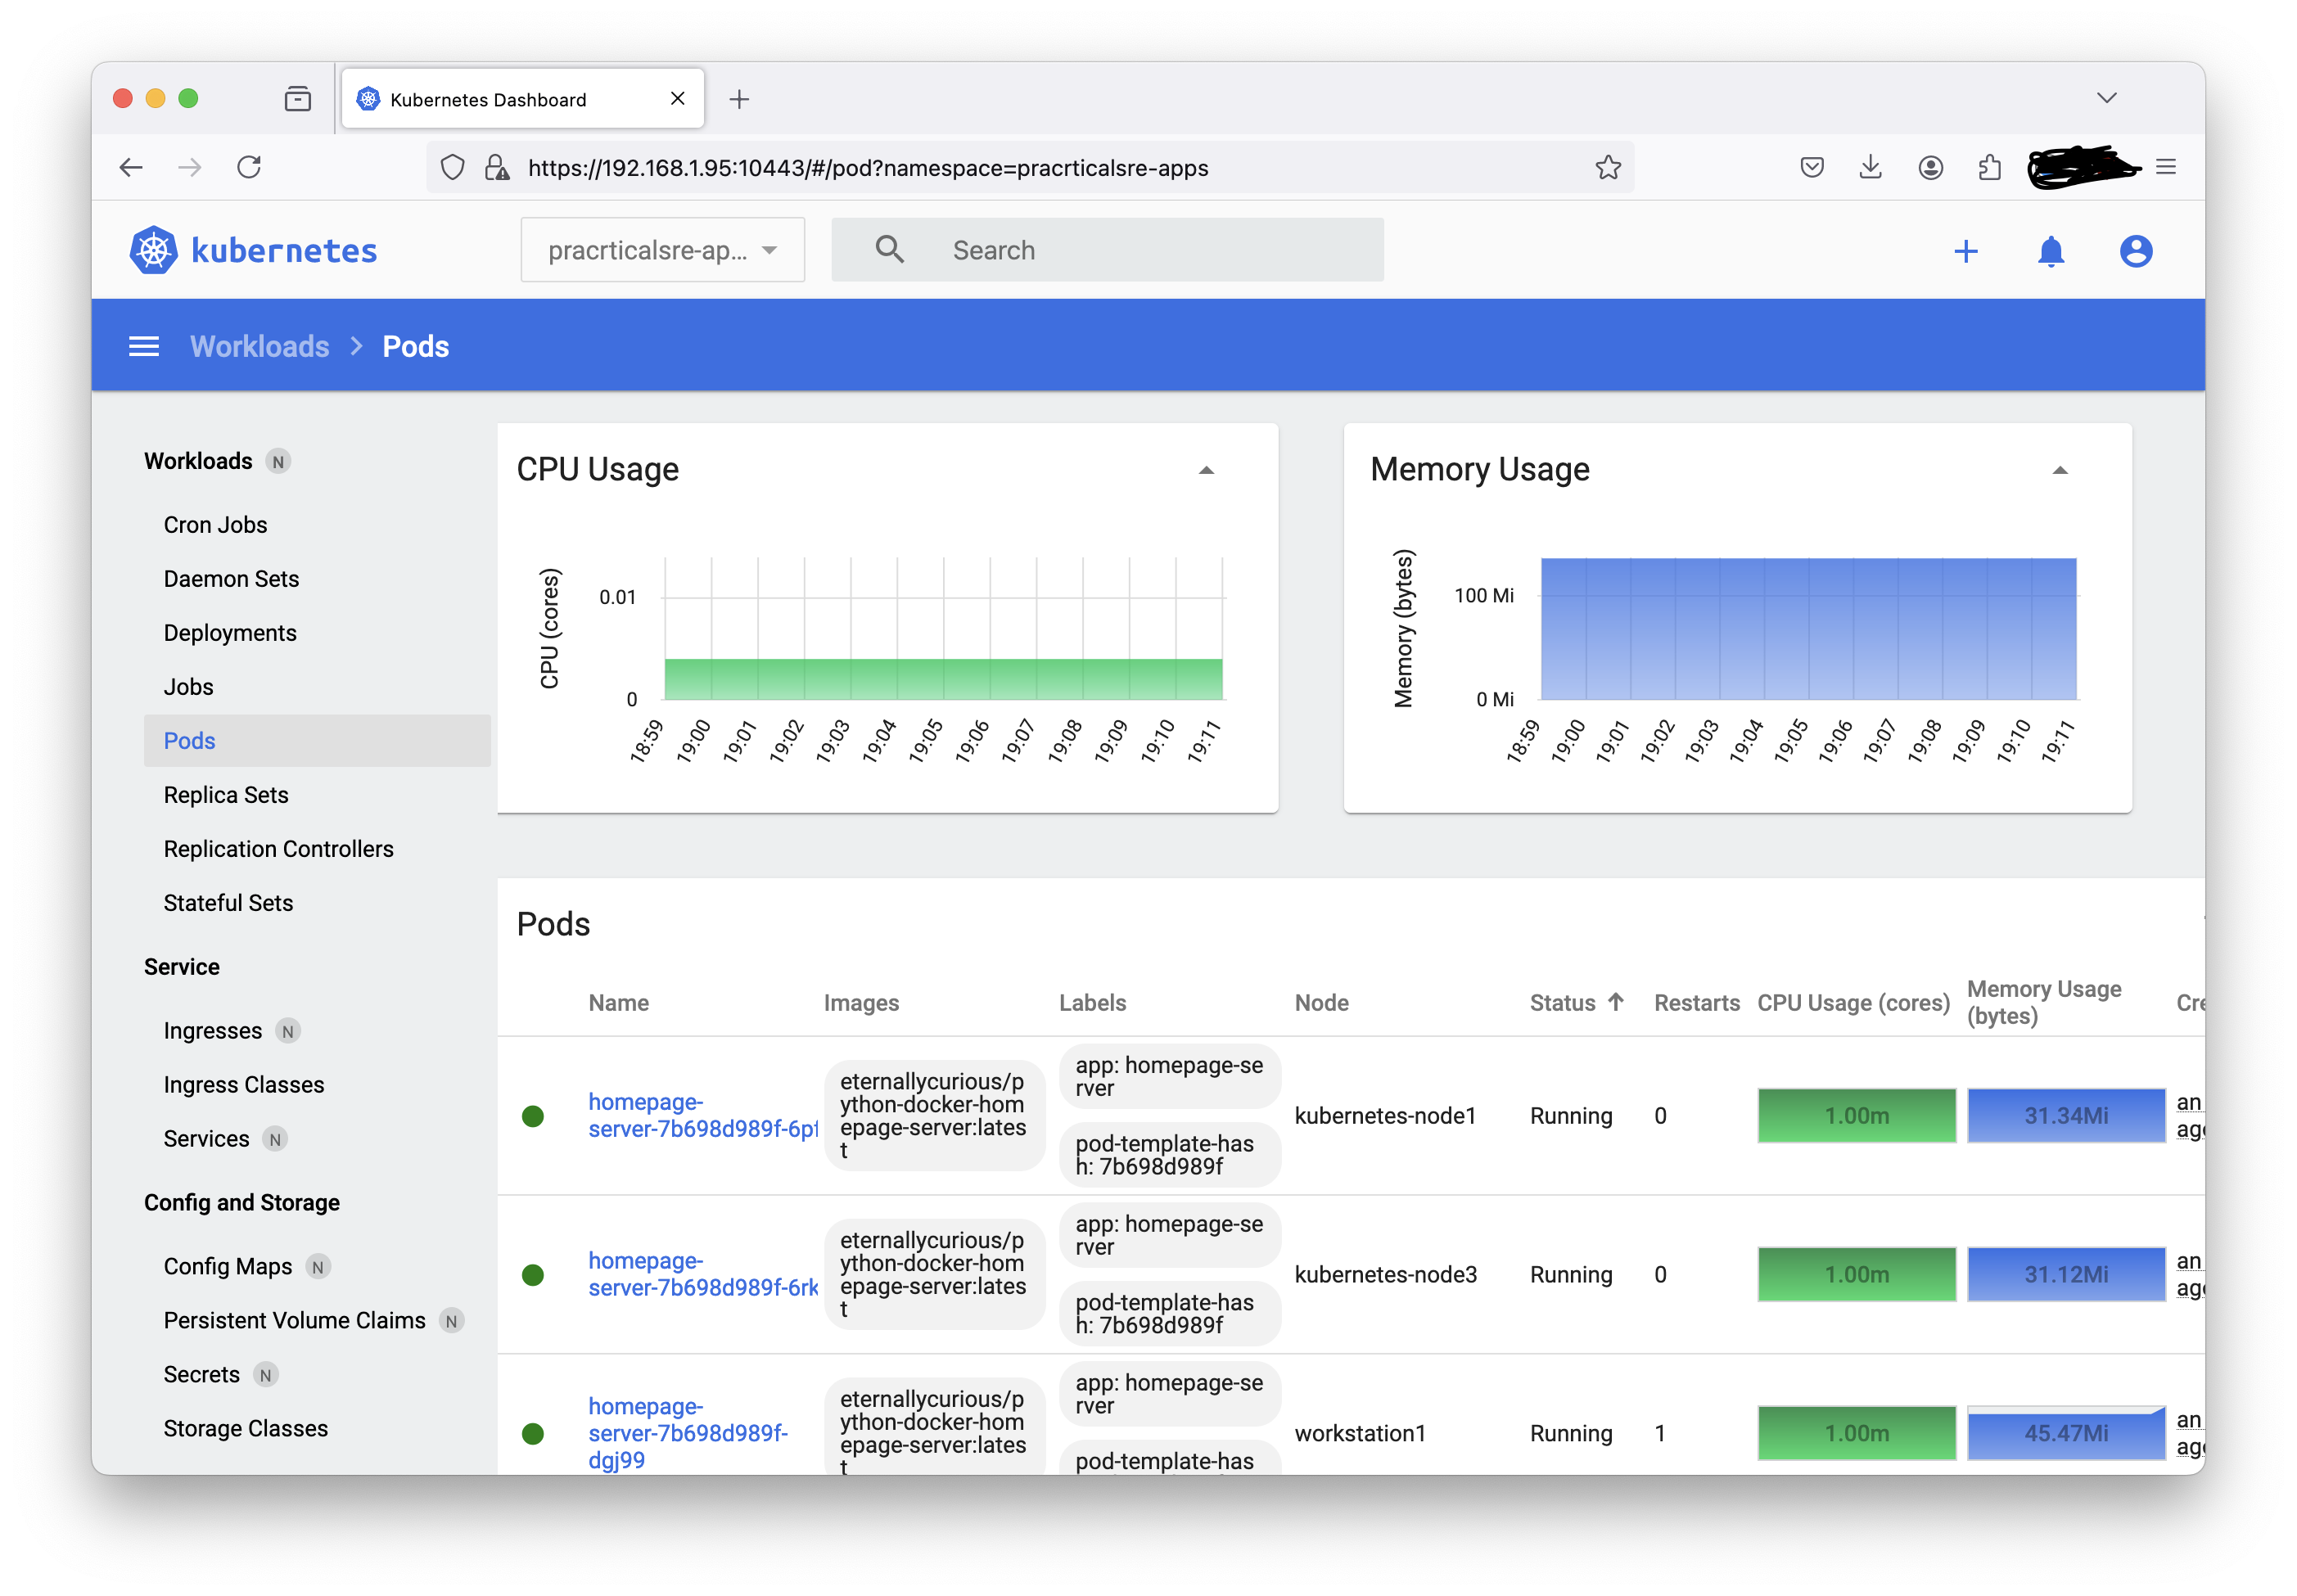
Since we ran the dashboard-proxy command, the metrics-server should now load on port 10443 on the controlplane node. You should use the token generated in the terminal to login to the web-browser. In my case the dashboard opens at https://192.168.1.95:10443. Here you can see all the resources in your cluster and all the cpu and memory metrics of each pod.

Explanding the cluster to multi-node
Now let’s designate one node as the controlplane/main node and the other three as worker nodes. We already named one of the nodes as controlplane, so we will run this command on that node.
Run this command “microk8s add-node” only on the controlplane node, and you have to run the command again for each worker node you want to add.
controlplane> microk8s add-node
From the node you wish to join to this cluster, run the following:
microk8s join 192.168.1.95:25000/2f5e06a1814beca1e75393d78c183a84/31eefbd99d97

Use the '--worker' flag to join a node as a worker not running the control plane, eg:
microk8s join 192.168.1.95:25000/2f5e06a1814beca1e75393d78c183a84/31eefbd99d97 --worker
Login to your worker nodes one by one and enter the joining command with the –worker flag.
kubernetes-node1> microk8s join 192.168.1.95:25000/2f5e06a1814beca1e75393d78c183a84/31eefbd99d97 --worker
Contacting cluster at 192.168.1.95

The node has joined the cluster and will appear in the nodes list in a few seconds.

This worker node gets automatically configured with the API server endpoints.
If the API servers are behind a load balancer please set the '--refresh-interval' to '0s' in:
	/var/snap/microk8s/current/args/apiserver-proxy
and replace the API server endpoints with the one provided by the load balancer in:
	/var/snap/microk8s/current/args/traefik/provider.yaml

Successfully joined the cluster.
Repeat the joining process for the remaining worker nodes, and once done, get back to the controlplane node and run the following command to check if the nodes joined successfully.
controlplane> microk8s kubectl get nodes -o wide
NAME           	STATUS   ROLES	AGE 	VERSION   INTERNAL-IP	EXTERNAL-IP   OS-IMAGE         	KERNEL-VERSION   	CONTAINER-RUNTIME
controleplane  	Ready	<none>   5d1h	v1.29.4   192.168.1.95   <none>    	Ubuntu 22.04.4 LTS   5.15.0-112-generic   containerd://1.6.28
kubernetes-node1   Ready	<none>   4d21h   v1.29.4   192.168.1.96   <none>    	Ubuntu 22.04.3 LTS   5.15.0-112-generic   containerd://1.6.28
kubernetes-node2   Ready	<none>   4d21h   v1.29.4   192.168.1.97   <none>    	Ubuntu 22.04.3 LTS   5.15.0-112-generic   containerd://1.6.28
kubernetes-node3   Ready	<none>   4d21h   v1.29.4   192.168.1.98   <none>    	Ubuntu 22.04.3 LTS   5.15.0-112-generic   containerd://1.6.28
Next, lets create a namespace for our applications to be deployed, this step is optional but recommended, so that our applications are organized more effectively.
>microk8s kubectl create namespace  pracrticalsre-apps
namespace/pracrticalsre-apps created
>microk8s kubectl config  set-context  --current --namespace  pracricalsre-apps
Context "microk8s" modified.
This completes the kubernetes cluster setup, and you are now ready to deploy applications to it!
Deploy a sample python application
We will deploy a simple python web application that was previously written and containerized in a docker image in a different article. Refer gettting started with docker. Just to recap, in that article, we created a simple python flask web application that will listen on port 8000 and respond with a simple message. We then packaged that into a docker image and published it in the docker registry. It can be downloaded using this link practicalsre/python-docker-homepage-server
High level tasks:
- Create a deloyment.yml file that will create pods (application instances)
- Create a Service that will expose these application port to the node, so it can be accessed by others in the local network
In your controlplane node, create a file called deployment.yaml and paste text this into it.
apiVersion: apps/v1
kind: Deployment
metadata:
  creationTimestamp: null
  labels:
	app: homepage-server
  name: homepage-server
spec:
  replicas: 5
  selector:
	matchLabels:
  	app: homepage-server
  strategy: {}
  template:
	metadata:
  	labels:
    	app: homepage-server
	spec:
  	containers:
  	- image: practicalsre/python-docker-homepage-server:latest
    	name: python-docker-homepage-server
    	command: ["gunicorn"]
    	args: ["webapp:app", "--bind=0.0.0.0:8000"]
    	ports:
    	- containerPort: 8000
Explaination: This is basically a template that defines how the application will be deployed. The app and labels are the names we have chosen to give to this pod. Under the spec, we have replica set to 5, so that this deployment template will spin up 5 pods of our application. The container image is the python application we created earlier. Kubernetes will download this container locally from the docker hub. The command is basically how we tell the application to be run/executed. Expanded, it translated to “gunicorn webapp:app –bind=0.0.0.0:8000”. And lastly, the containerPort is the port on the pod that needs to be exposed.
Now run the apply command to deploy the pods and get command to see the pods once deployed.
>microk8s kubectl apply -f deployment.yaml
deployment.apps/homepage-server created

>microk8s kubectl get pods
NAME                           	READY   STATUS          	RESTARTS   AGE
homepage-server-7b698d989f-6gc6g   0/1 	ContainerCreating   0      	3s
homepage-server-7b698d989f-6pfbc   1/1 	Running         	0      	3s
homepage-server-7b698d989f-6rkl2   1/1 	Running         	0      	3s
homepage-server-7b698d989f-dgj99   1/1 	Running         	0      	3s
homepage-server-7b698d989f-zxmmd   1/1 	Running         	0      	3s
You can also run the -o wide flag to see which node the pods were deployed to. Here you can see that the pods are evenely distributed across all nodes.
>microk8s kubectl get pods -o wide
NAME                           	READY   STATUS	RESTARTS  	AGE 	IP        	NODE           	NOMINATED NODE   READINESS GATES
homepage-server-7b698d989f-6gc6g   1/1 	Running   0         	2m43s   10.1.4.100	controleplane  	<none>       	<none>
homepage-server-7b698d989f-6pfbc   1/1 	Running   0         	2m43s   10.1.129.84	kubernetes-node1   <none>       	<none>
homepage-server-7b698d989f-6rkl2   1/1 	Running   0         	2m43s   10.1.81.42	kubernetes-node3   <none>       	<none>
homepage-server-7b698d989f-dgj99   1/1 	Running   1             2m43s   10.1.22.66	kubernetes-node2   	<none>       	<none>
homepage-server-7b698d989f-zxmmd   1/1 	Running   0         	2m43s   10.1.22.90	kubernetes-node2   <none>       	<none>
Next, we will create a service so that these pods can be accessed from outside the cluster. Currently, only the pods can connect to each other, but the service will create a NodePort so that the pods can be accessed from the ports of the actual worker node. These nodeports are randomly generated.
>microk8s kubectl expose deployment homepage-server --type=NodePort --port=8000 --name=homepage-server-exposed
service/homepage-server-exposed exposed
Run kubectl get all to see the resources we now have running. There is one deployment (the replicaset gets auto created), there is one service which exposes the container port 8000 to port 32140 on the physical node(virtual machine in our case). And there’s the 5 pods that were created since we specified 5 replicas in our deployment.
>microk8s kubectl get all
NAME                               	READY   STATUS	RESTARTS    	AGE
pod/homepage-server-7b698d989f-6gc6g   1/1 	Running   0           	7m28s
pod/homepage-server-7b698d989f-6pfbc   1/1 	Running   0           	7m28s
pod/homepage-server-7b698d989f-6rkl2   1/1 	Running   0           	7m28s
pod/homepage-server-7b698d989f-dgj99   1/1 	Running   1		7m28s
pod/homepage-server-7b698d989f-zxmmd   1/1 	Running   0           	7m28s

NAME                          	TYPE   	CLUSTER-IP   	EXTERNAL-IP   PORT(S)      	AGE
service/homepage-server-exposed   NodePort   10.152.183.160   <none>    	8000:32140/TCP   44m

NAME                          	READY   UP-TO-DATE   AVAILABLE   AGE
deployment.apps/homepage-server   5/5 	5        	5       	7m28s

NAME                                     	DESIRED   CURRENT   READY   AGE
replicaset.apps/homepage-server-7b698d989f   5     	5     	5   	7m28s
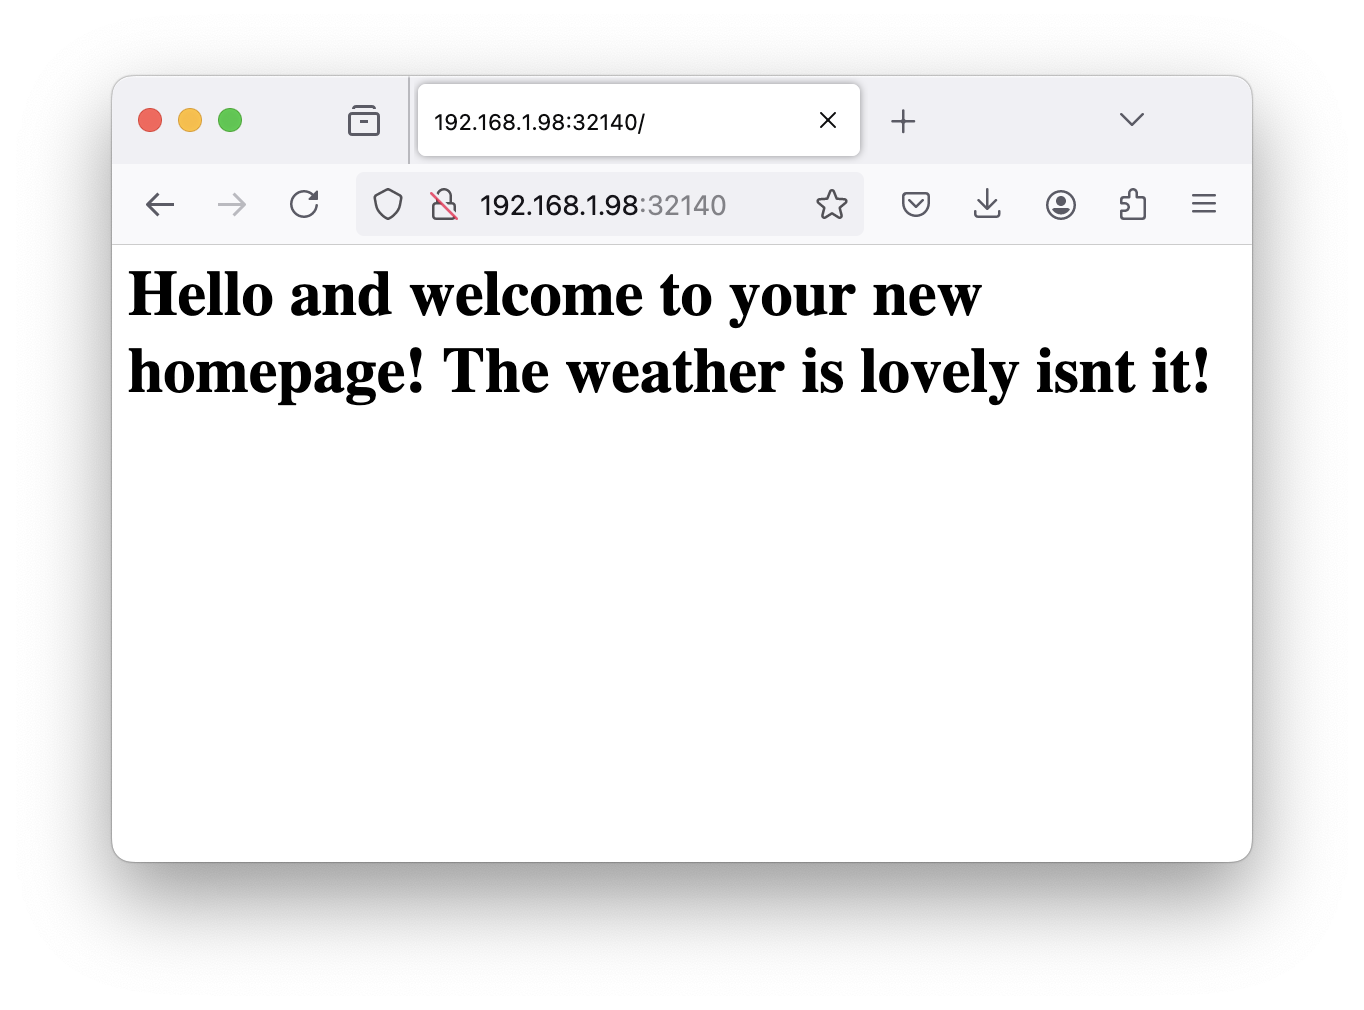
Now if you visit any of your nodes on port 32140, you will be greeted with the python application:
For example, in my case 192.168.1.95:32140 will show the application in the browser.

Here are some handy kubectl commands to operate your kubernetes cluster. A full list can be found on the official website
kubectl get pods  #show all pods
kubectl get namespaces #show all namespaces
kubectl get deployments #show all deployments
kubectl get all #show all the resources
kubectl describe deployments <deploymentname>  #get the deployment details in ful
kubectl log  <podname>  #get the logs from the pod
Conclusion
In this article we installed a multi-node kubernetes cluster in our homelab using microk8s. This gives us the ability to rapidly deploy and run any application in the cluster. Lab environments like this can be very helpful in learning microservices architecture and how to run, manage and troubleshoot applications in the cloud.
